Clémentine de Eternal Sunshine of the Spotless Mind : illustration à la gouache étape par étape.
Ma Clémentine à la gouache: My Clementine with gouache:
Bonjour à toutes et à tous!
J’espère que vous allez tous bien. J’ai de nouveau pris le temps de réaliser une illustration à la gouache. Cette fois-ci j’ai illustré le personnage de Clémentine de Eternal Sunshine of the Spotless Mind par Michel Gondry. Découvrez les étapes ci-dessous, je les ai un peu détaillées avec des légendes et des références. Si vous souhaitez zoomer sur les images, cliquez dessus!
Suivez-moi sur les réseaux sociaux! Facebook, Twitter, et Instagram.
Bonne journée!
Hello!
I hope you are all well. I again took time to make a gouache illustration. This time I illustrated the character of Clementine from Eternal Sunshine of the Spotless Mind by Michel Gondry. I have detailed some with captions and references. If you want to zoom in on the images, click on it!
Follow me on social networks! Facebook, Twitter, Hellocoton and Instagram.
Have a nice day!
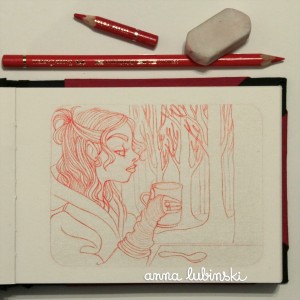
Étape 1: Croquis préparatoire au crayon de couleur Polychromos rouge (Pale Geranium Lake – 9201-121) de la marque Faber-Castell. / Step 1: Preparatory sketch with Polychromos red pencil (Pale Geranium Lake – 9201-121) from the Faber-Castell brand.
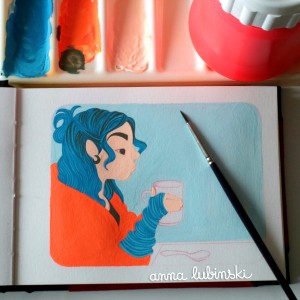
Étape 2: Les aplats et les détails bleus à la gouache, ou plus exactement de la gouache blanche à laquelle j’ai mélangé de l’aquarelle pour avoir ce bleu éclatant. / Step 2: The flat areas and details with blue gouache, or exactly with white gouache on which I mixed some blue watercolor to obtain this bright blue.
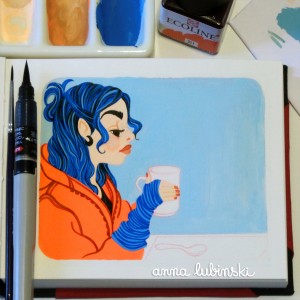
Étape 3: Ajout des couleurs chaudes. Pour le orange fluo, j’ai mélangé mon acrylique rouge fluo Daler Rowney (Rouge Fluorescent) avec de la gouache Pébéo Studio jaune et blanche. Puis j’ai mélangé ce orange au bleu pour l’effet racines des cheveux. / Step 3: Adding warm colors. For the fluorescent orange I mixed my neon red acrylic Daler Rowney (Red Fluorescent) with yellow and white Pébéo Studio gouache. Then I mixed this orange to blue for the roots effect of the hair.
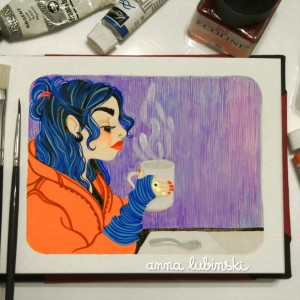
Étape 4 : J’ai attaqué les détails noirs au feutre pinceau Pentel et aux encres de couleur Écoline. / Step 4: I pushed the black details with the Pentel brush and Écoline colored inks.
Étape 5 : J’ai fignolé les derniers détails. Encre violette Pelikan pour le fond. Peinture fluo diluée. Peinture dorée pour les bagues et les boucles d’oreille. Peinture argentée pour la cuiller. / Step 5: I tweaked the final details. Purple Pelikan ink for the background. Fluorescent paint diluted. Gold paint for rings and earrings. Silver paint for the spoon.
Enregistrer
Enregistrer
Commencez à saisir votre recherche puis pressez Entrée. Pressez Echap pour annuler.

 Bonjour à toutes et à tous!